
You want to serve your website with https so that all the transactions on it are secure. There are two domains of your single website:
These domains should point to an ELB inwhich you do the load balancing among EC2 instances serving your website.
Step 1: Create SSL Certificate
You are able to obtain SSL certificates for free by using AWS Certificate Manager Service
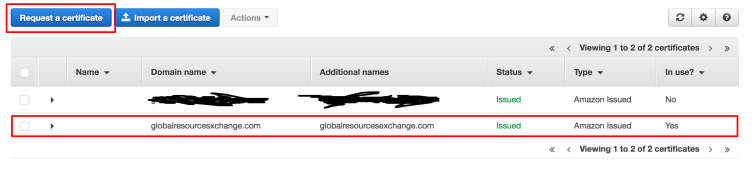
Note that you have to wait for a while before the certificates are issued by Amazon.
Step 2: Create ELB
You should select
- Application Load Balancer
- Internet facing
- Load Balancer Protocol: select both HTTP and HTTPS
- Configure Security Settings: Choose an existing certificate from AWS Certificate Manager (ACM)
- Configure Routing: Edit path to /index.html which is the index file of your webserver
- Register Targets: add your instance to registered on port 80
After ELB is created, you should have an ELB domain name, copy it into clipboard.
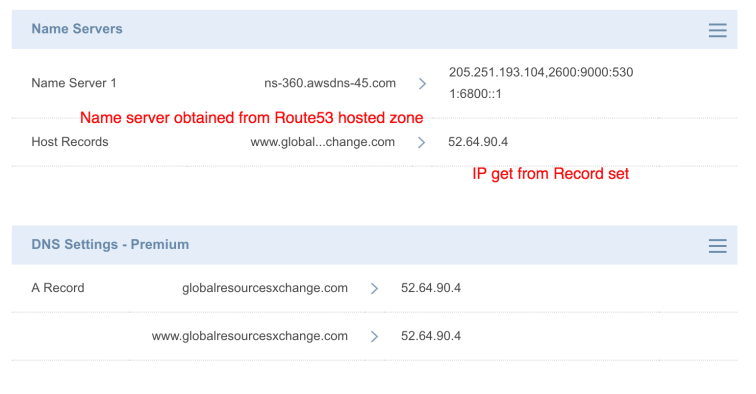
Step 3: Create Hosted Zone with Route53
Go to Route53 service and create two hosted zones:
- globalresourcesexchange.com.
- globalresourcesexchange.com.
With each hosted zone, create a record set

Test the newly created record set, you will get the IP address of your domain.

Step 4: Point your domains to the Route53 record
That’s it! Now when you type http://globalresourcesexchange.com, browser will redirect to https://globalresourcesexchange.com. The same appy to http://globalresourcesxchange.com
