Nothing is more common than a loader, you see it everywhere.
I will show you how to make one like the above. You can create a new pen and make one by your own.
Interested? Cool, read on!
First, you need to create a loader div in HTML
<div class="loader"></div.>
Then you decor it with CSS
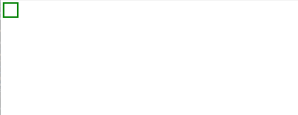
.loader {
  width: 40px;
  height: 40px;
  border: solid green 5px;
}
This time we create a green rectangular 40 x 40 px
Nice, but it stays on top left corner of the browser, we need to have it in the center.
.loader {
 position:fixed;
 top: 50%;
 left: 50%;
 width: 40px;
 height: 40px;
 border: solid green 5px;
}
Now we’ll color it on its left and top borders.
.loader {
 position:fixed;
 top: 50%;
 left: 50%;
 width: 40px;
 height: 40px;
 border: solid green 5px;
 border-left-color: red;
 border-top-color: red;
}
Look what we have here

The loader we need should be a circle, uhm… we need to change the CSS a litle bit
.loader {
 position:fixed;
 top: 50%;
 left: 50%;
 width: 40px;
 height: 40px;
 border: solid green 5px;
 border-left-color: red;
 border-top-color: red;
 border-radius: 50%;
}

Great! This looks a lot nicer. Time to make it spin!
.loader {
 position:fixed;
 top: 50%;
 left: 50%;
 width: 40px;
 height: 40px;
 border: solid green 5px;
 border-left-color: red;
 border-top-color: red;
 border-radius: 50%;
 animation: rotate 600ms infinite linear;
}

@keyframes rotate {
 to {
 transform: rotate(1turn)
 }
}
Awesome, now we have the loader we wanted! You can change its color and spinning speed as you like.
